
Final picture (above)
1. I used hue/saturation to make the blues in our shirts and the greens in the tree come out. I raised the saturation a little on both.
2. The wood piece we are sitting on had green that was brought out when I did the green saturation so I erased the top layer so that the orignial layer would show through the true brown color.
3. I used the clone stamp to make Tyson's sun glasses disapear.
4. I used the burn tool to make the outside of the picture have a darker hue. 
Original picture (above)
 Final Picture
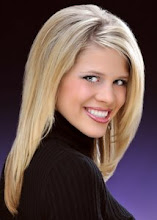
 Necklace I put around my neck
 Origninal picture
This photo is of my dear friend Buck Dopp, (Buck judged me when I won Miss Utah) my lovely hubsand Tyson, and myself.
1. I didn’t like how red my face was so that was and I wanted to do other touches to make the photo look better. In photoshop I went to image, adjustments, hue/saturation. I clicked on red and then lowered the saturation to -21.
2. I wanted to make the three of us stick out above the crowd so I made two layers of the picture. On the top layer I went to fliter, blur, gaussian blur and I chose 2.0 pixels of blur. On that same layer I esrased us three so that the original image would show through.
3. I wanted to fill my hair in because it looked too thin so I used the clone tool. I went to clon stamp and then filled in my hair.
4. I wanted to be wearing a necklace so I googled a necklace image. The necklace had a black background so I used the magic wand and selected the balck areas and erased them. I then click Control T and held down the shift button to make the image smaller. I tilted the image to fit around my neck and then I erased the parts that were supposed to be behind my hair.
That is the cutest picture of you two! I just love it!
ReplyDelete